

The long journey began on one day in 2006 when Chee Yung sent me an e-mail message asking me to bid for, and share with him, a batch of hardly used tools for bamboo rod making put up in E-Bay. I obliged and bided with starting value and told myself to drop it if someone was competing for it. It was destined that we ended up with the tools as no one else participated in the bidding other than I. Hence I ended up winning the bid at opening bid price. But there was a problem in shipping because the seller resides in a small place in a certain USA county side and he would only ship to US domestic address by surface delivery. Coincidentally, my all-time fishing buddy, Adi has a daughter residing in San Diego and he was to visit her at the time the bid closed. Adi was kind enough to help receive the shipment while in San Diego and arranged for International shipping through UPS. The cost of shipping the batch of tools alone came to US$580! All my other fishing buddies said I was mad to pay such colossal amount just for shipment.

Upon receipt and inspection, it was found that the bamboo culms that were included in the list were not shipped. A fresh order for grade A+ Tonkin bamboo culms together with some components were placed on an US Supplier. The day the bamboo culms were received, the long journey unfold.
When the Tonkin bamboo arrived, it was discovered that one of the six culms has suffered multiple splits during the shipment. I decided to split this culm first to prevent it from further damage. In the splitting process, the split line ”walked” off course and has to be deliberately corrected to obtain as many good strips as possibly can. Due to this and the culm suffering many splits beforehand, only 16 reasonably good strips were obtained. The nodes were filed, heated slowly and carefully over an alcohol lamp and the bumps and bends painfully straightened.
The first rod I intended to craft is based on Garrision 209 taper. It is a 7-1/2 ft two piece rod. Many people found it good for 4WT line. As I am following the grand master’s footstep, I decided to use his six cylinders internal combustion engine theory of staggering the nodes in arranging the six strips in blank formation. After marking all the strips, six for the butt and another six for the tip, I tied them in bundles to avoid mixing up. When I took out the rough cut planning form made of mild steel, it was rusted pretty badly on the surface. A steel wire thistly brush was first used to remove the rust, and then followed with steel wool to clean up the surface. After that, the form is adjusted to relevant depth plus allowance for shrinkage with the help of a depth gauge.
A Lie Nielsen low angle plan was used to plan the strips to rough cut dimensions set in the form. Most strips came off the culm uneven. 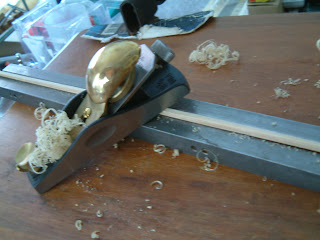 Some strips are broad at one end and thin at the others while some have thin sections at several places along the length. Much effort was spent on the strips to plan them to near-isosceles triangular shape in cross section. In the process of planning, the enamel side was left untouched. This process took long time to complete as only a few thousandth of an inch would be removed at a time. It could not be accelerated or else that would leave a “lift” in the strip. If the lift is bad, the strip has to be scraped.
When all the strips were planned, I faced with a new challenge. As the tools I received did not include a heat treatment oven, I need to construct one. Tapping my engineering experience and asked around for sources, I purchased a section of 78 inches long 3” diameter stainless steel pipe and have a cape welded to one end. I also got the welder to construct a cap for the opening end. The outer surface was wrapped with 2” wide 1/16” thick fiberglass insulation material left behind in my previous project long time ago. Aluminum wire mesh was cut, joined and inserted into the tube to serve as separation between the heating element and bamboo compartments. An industrial standard electrical heating element of 72” and a thermostat control unit were purchased. But a new problem evolved. How to support the heating element and thermostat sensor in the tube? If they were left lying on the bottom of the tube, the electrical heating element would come into contact with the stainless steel wall and short circuit the electric loop. Electric insulated heat withstanding material must be used. Mica came to mind but where to get such material? This haunted me for a few weeks until one day my son, who is studying civil engineering mentioned to me to use clay. Clay use by sculptors to form art pieces was bought, neaten to form blocks with recess conform to heating element, and holes to run thermo sensor and high temperature resistance electric cables. When the clay blocks were sufficiently dry and everything assembled, I thought I had it but horrible thing happened!
When the oven was fired up the first time, I wanted to feel the heat on one exposed part of the outer surface by hand. I almost got electrocuted. This caused the circuit breaker in my house to trip and black out the entire house! I have checked the circuit with an electrical multimeter before power it up and there was no connection between electrical loop and the metallic shell. Why electrical charge was collected on the shell?! I couldn’t believe it! I checked the circuit again and again to ascertain no contact between the electrical loop and the outer shell yet it tripped the system a few minutes after it was switched on every time. This kept me puzzled for a few weeks and the only theory I could come out was that the cylindrical shape of the tube encasing the cylindrical electrical heating element formed a capacitor. When the shell accumulated sufficient charge, it discharged through the cable that went through it and caused the circuit breaker to trip. It was blessing in disguise that this first design failed as the insulation on the outer shell was way too thin and the two ends were not insulated at all.
I set upon to design a rectangular shape oven and sourced around for a workshop to fabricate the same. I asked around shops in likely places that I knew and someone referred me to a shop. When I presented my drawings to them and stated that I wanted the material to be 3 mm stainless steel sheet, the saleslady warned me it would be expensive as prices of stainless steel has went through the roof of late. It has always been my philosophy to obtain highest quality for things I intend to acquire. I also know that good things don’t come cheap. Hence I bit the bullet and went with stainless steel. Before the oven was fabricated, I also sourced around for 1” thickness heat insulation material. Through my years of engineering experience, I found a company located in Tuas that deals with rock wool and fibreglass insulation materials. Sample was sent and that was exactly what I wanted. However, the company only sells the Rockwool insulation sheets in a bale of 12 and they do not deliver. I had to buy the whole bale although I only needed 2 sheets and I had to drive to Tuas to collect it myself. When the shells were completed, I faced another problem. I designed the oven to have a length of 78” so that I can craft one-piece 6ft rod in the future. The shells were too long to fit into my car! I had to engage the help of Billy Teo who drove his minibus to collect the oven together with me. Even then, he had to fold down two rows of seat in order to accommodate the oven shells. Stuffing heat insulating material between the inner and outer shell required the muscle of two men. When it was finally assembled, I took a deep breath and down a large jug of icy cold water!
After installing the heating element and thermostat controller, I was looking for temperature indicator. Most indicators sold in the market required holes to be drilled in the inner as well as outer shell to insert the sensor into the oven cavity and cable running along the length of the oven. I held back the temptation to buy an indicator with digital reading and came across a non-contact infrared digital thermometer at reasonable price. Now that I have everything assembled and ready but I was a bit hesitant to fire it up upon completion. If it failed again, my investment of over $1500 will go down the drain. I procrastinated for a week or two until one day I decided to give it a go. To make assurance doubly sure, I took a step to cut down the risk of tripping by connecting one long cable between the outer shell and an iron pipe in my garden to provide grounding for the unit. It was great relief when the electrical system was not tripped after 10 minutes of switching on the circuit. I knew I had a beautiful working oven on hand.
The six strips for the butt section and another six for the tip were bound together with cotton cord using Garrison binding outfit. The oven was pre-fired to required temperature that was confirmed with the handheld thermometer. The two sections were placed in the oven for 5 minutes then withdrawn from the oven quickly, turned around end to end and reinserted into the oven for another 5 minutes. Turning the ends around was to make sure that the heat treatment is done as evenly as possible. After the sections were taken out and let to cool, they showed apparent sign of shrinkage as moisture has been driven out of the strips.
The planning form made of mild steel that came in the package was rusty and dirt also gathered in the grooves. I gave it a thorough workover by removing all the bolts, cleaned them, greased them before putting them back in place. The two halves of the form body was scrapped with steel wire thistle brush, sanding with 400/600 grit sand paper and cleaned with steel wool to restore its shine.

Then the required taper was set into the form using depth gauge with an accuracy of 0.0005”. The planning of strips into required taper took a long time for several reasons.  1, only 0.003”~0.001” thickness shaving were removed from one face of the strip on each stroke of the plane. The planning was done on alternate faces upon completion of each stroke on one face. 2, the enamel is difficult to remove and the flattening of uneven enamel side is a delicate process.
  3, the bamboo strips hardened somewhat after heat treatment. Frequent grinding of the plane’s blade was needed. 4, the running direction of the fibre around node made it necessary to plan certain strip in opposite directions at specific locations. 5, the strips needed to be measured with micrometer after every other stroke of the plane to ensure no over-cut of dimensions. I bought a high accuracy micrometer with reading of 0.00001” locally for this purpose.
  6, have to cure my itch making fishing trips to Indonesian and Maldives waters. Last but not lest, I had to dropped everything to attend to my sick parents’ needs every now and then.
Before constructing the oven, I also bought Epon epoxy glue from an USA supplier who sold it to people making laminated wooden strips that turn into bow for archery. Well, I think if Epon is good for bow, it will be good for bamboo rod. Another good feature of Epon is that it has long working time allowing ample time to glue the two sections before the glue is set. To try out the glue, I spliced several pieces of bamboo strips that were cut off from those that were used for the two sections. I intended to use the two strips obtained from glued up pieces to fill the shortfall for the spare tip I would be making in the future. Unfortunately, the oven was not ready for use then. This resulted in the lack of strength in the glued line on one strip. I had to re-glued and tempered-cure to attain better strength this particular strip after the oven was up running.
The planned- to-taper strips were cleaned thoroughly with alcohol.  The gluing and binding process was straight forward. The straightening of strips to take out twists and turn in strips to get both sections to as straight as possible took some efforts and time. I was glad I chose Epon that gave me ample time to work on the sections in this aspect. Phew!!
The glued up butt and tip sections were let to set overnight. The cord that was used to bind the sections was removed, remaining glue on the sections cleaned. The sections were bound again, let to dry for 24 hours and heated in oven to cure the Epon glue for added strength. Then the cord was removed, remaining glue scrapped, bends straightened using a professional heat gun purchased locally and smoothened with fine grit sand paper. A thin layer of tung oil was applied to the surfaces after they were cleaned. Voila, two sections of blonde bamboo blanks showing grains of fibre were born. I hung the two sections up for the tung oil to dry while making a trip to Hainan Island with two golfing friends and our wives.
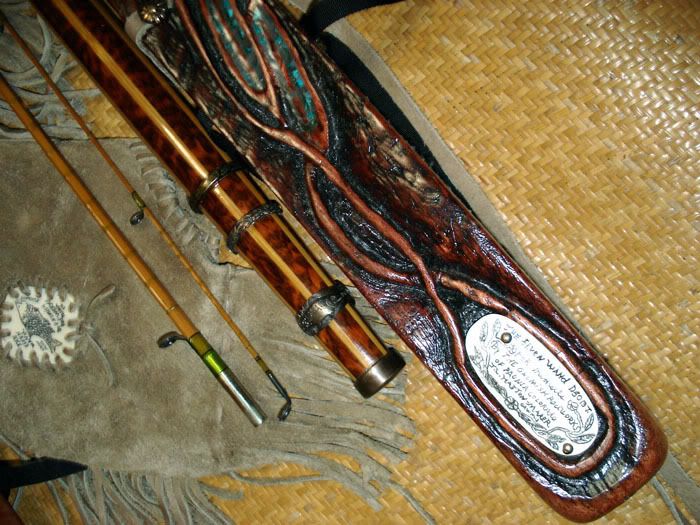
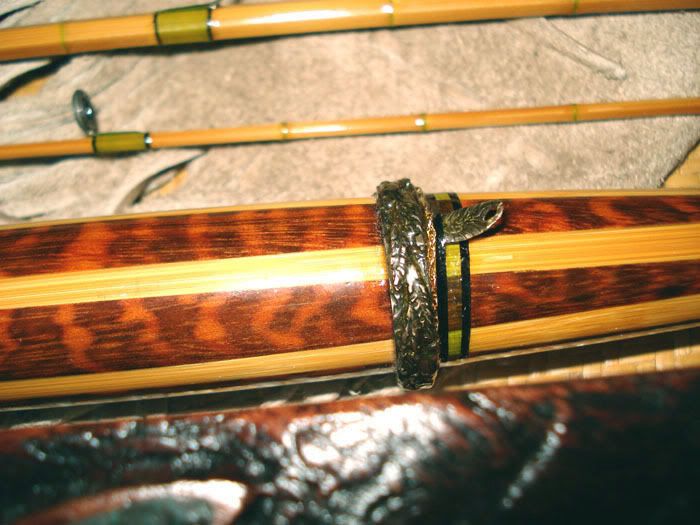
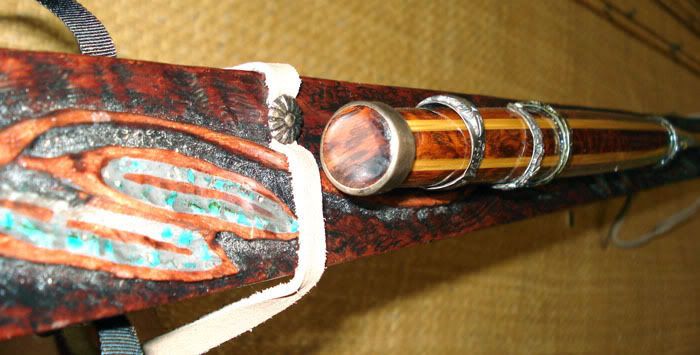
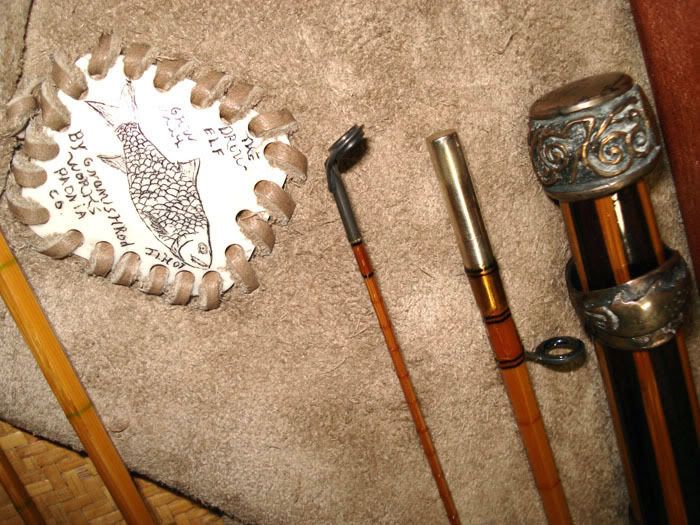
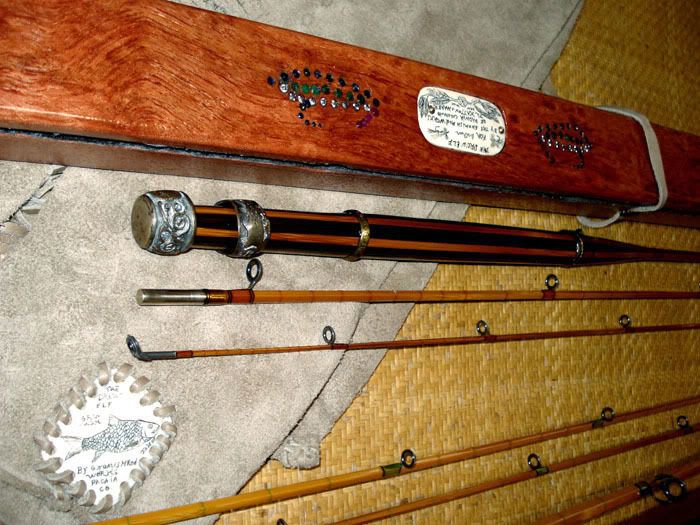
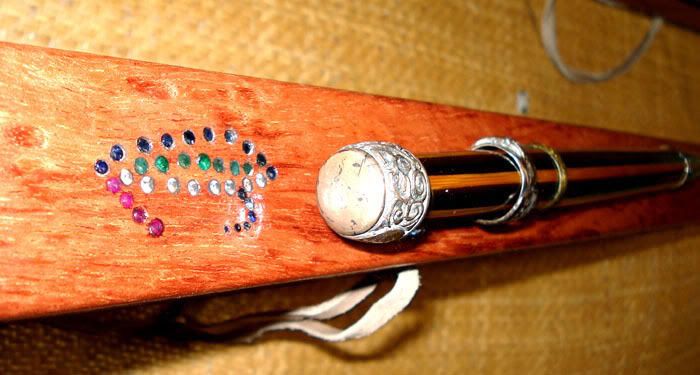
Before I went on my trip to Hainan Island, I placed order on an US supplier for a Bellinger NS uplocking reel seat with burl maple wood insert, a set of supper Swiss NS ferrules, a natural stone colour agate striper guide and a bottle of camellia oil. The supplier delayed the shipment and compensated me with a NS hexagonal winding check that fits nicely on my rod. Upon receipt of the components, I glued up 12 pieces of cork rings left over from my previous project, together with a cork ring with recess for the hood in reel seat that came with it. The glued up handle was shaped on my wood lathe to semi full-well contour with rather large diameter to fit my big hand.
When the tung oil was sufficiently dried , I cut the blanks on locations where ferrules are to fix and turned the ferrule stations to size on lathe. The ferrules were feathered on the lathe, then by hand with sand paper to make smooth and gradual transition from bamboo to NS barrels. Slow cure epoxy was mixed and inserted into the ferrules as well as spreaded on the bamboo. Ferules were fitted on the bamboo blanks and forced against the floor to drive out the extra epoxy and air pockets. When the glue was set, the blanks were rolled by hand as well as in a spine catcher to ascertain the spine and so marked. The tip section was cut to length and tip top fitted. The cork handle was fitted and glued onto the butt section, again with slow cure epoxy. Then the reel seat was glued in multiple stages according to the marked spine. When the glue was set, I realized that the supplier who sold me the components forgot to ship the sliding ring for the reel seat. I wrote to them to request for the ring and a new butt cap. In the final stage, I had to use fire to burn the old butt cap to loosen up the epoxy glue in order to pull it out. The slide ring was inserted and new butt cap re-glued to complete the whole assembly.
 Before I embarked on this project, I already acquired a set of snake guides making tool together with several sections of spring wire. I made up a dozen snake guides to different sizes, picked 8 to make a set for the rod. The feet of stripper and snake guides were ground to make gradual transition for the thread to mount. Guide positions were marked on the blanks and guides wrapped on with size A silk threads. I decided on scarlet wrappings tip with black beforehand. On the butt section, initially I wrapped the section just in front of the winding check without a hook keeper. Then I decided to include one with some signature wraps. I made a hook keeper by hand and re-wrapped the section with the hook keeper and added on the signature wraps.
Before I began the wrapping, I designed a dip tank head with o-ring seal and screw holes to adapt a cap to seal up the tank. I took the design to a machine shop and asked them to machine the setup out of solid stainless steel block. Again, it cost a fair bit as prices for  stainless steel already shot through the roof! I also bought two end caps and 3/8” ball valves each and gave them to the machinist to make up a connector so that the vales could be mounted at the bottom of the tank to drain the content. Meantime, I bought a 54” long section of stainless steel pipe of 2” diameter and cleaned the internal walls with caustic solution. I gave the pipe, the head and the end cap with connector for ball valve to a welding shop to weld them together to form a tank. The welder did a good job not only welded the joints professionally, he also polished the external to shining finish. Chee Yung said it look like part of a nuclear installation when he first saw it.
When the dip tank came back to me, I installed the ball valve, bolted up the cap and injected compress air to test for leakage. It was air-tight! The internal wall was further cleaned with acid and caustic solution, then flushed with running water. It was left under sun to drive out the moisture. A structure made of galvanized steel and aluminum angle bars was constructed to hold the dip tank. Guide rails fitted above the tank to allow a block made with rollers and hooks to glide up and down just above the tank. When this structure was competed and dip tank installed, it look like a rocket launcher. I name it the Discovery Launch Pad!
Three cans of marine varnish (1 litre each) were purchased and I decided  to use it as it was without thinning it down. The tank almost took all 3 litres. The surfaces of both sections were wiped clean with thinner and then blown dry with compress air to make sure no particles were left on them. The tip section was first dipped into the tank and withdrawn at snail speed with the help of a variable speed motor/gear box driving mechanism, stainless steel cable, pulley and guide block. Strips of blotching paper were pocked into the guides as they came out from the varnish. The butt section was dipped until the front end of the handle barely touched the varnish. Both sections were hung in a totally enclosed wooden drying cabinet. I have a wooden cabinet constructed for previous project but its height was not enough for the longer sections. I had to extend the height in order to accommodate the new sections. The internal was vacuumed to get rid of dust prior to the dipping process.
 The two sections were taken out of the drying cabinet for inspection three days later. The thick varnish caused some bumps at some locations. These were leveled with fine grit sand paper and touched up with thinned-down varnish. One week later, the vanish surface were buffed with rotten stone powder. The buffing brought out some shine in matt finish and the rod looked just perfect. There and then, the first crafted in Singapore bamboo rod was born. I name it LeoRod.


